
As you have installed a new payment gateway, your vendors should connect their stores to Stripe Connect to receive the payments.
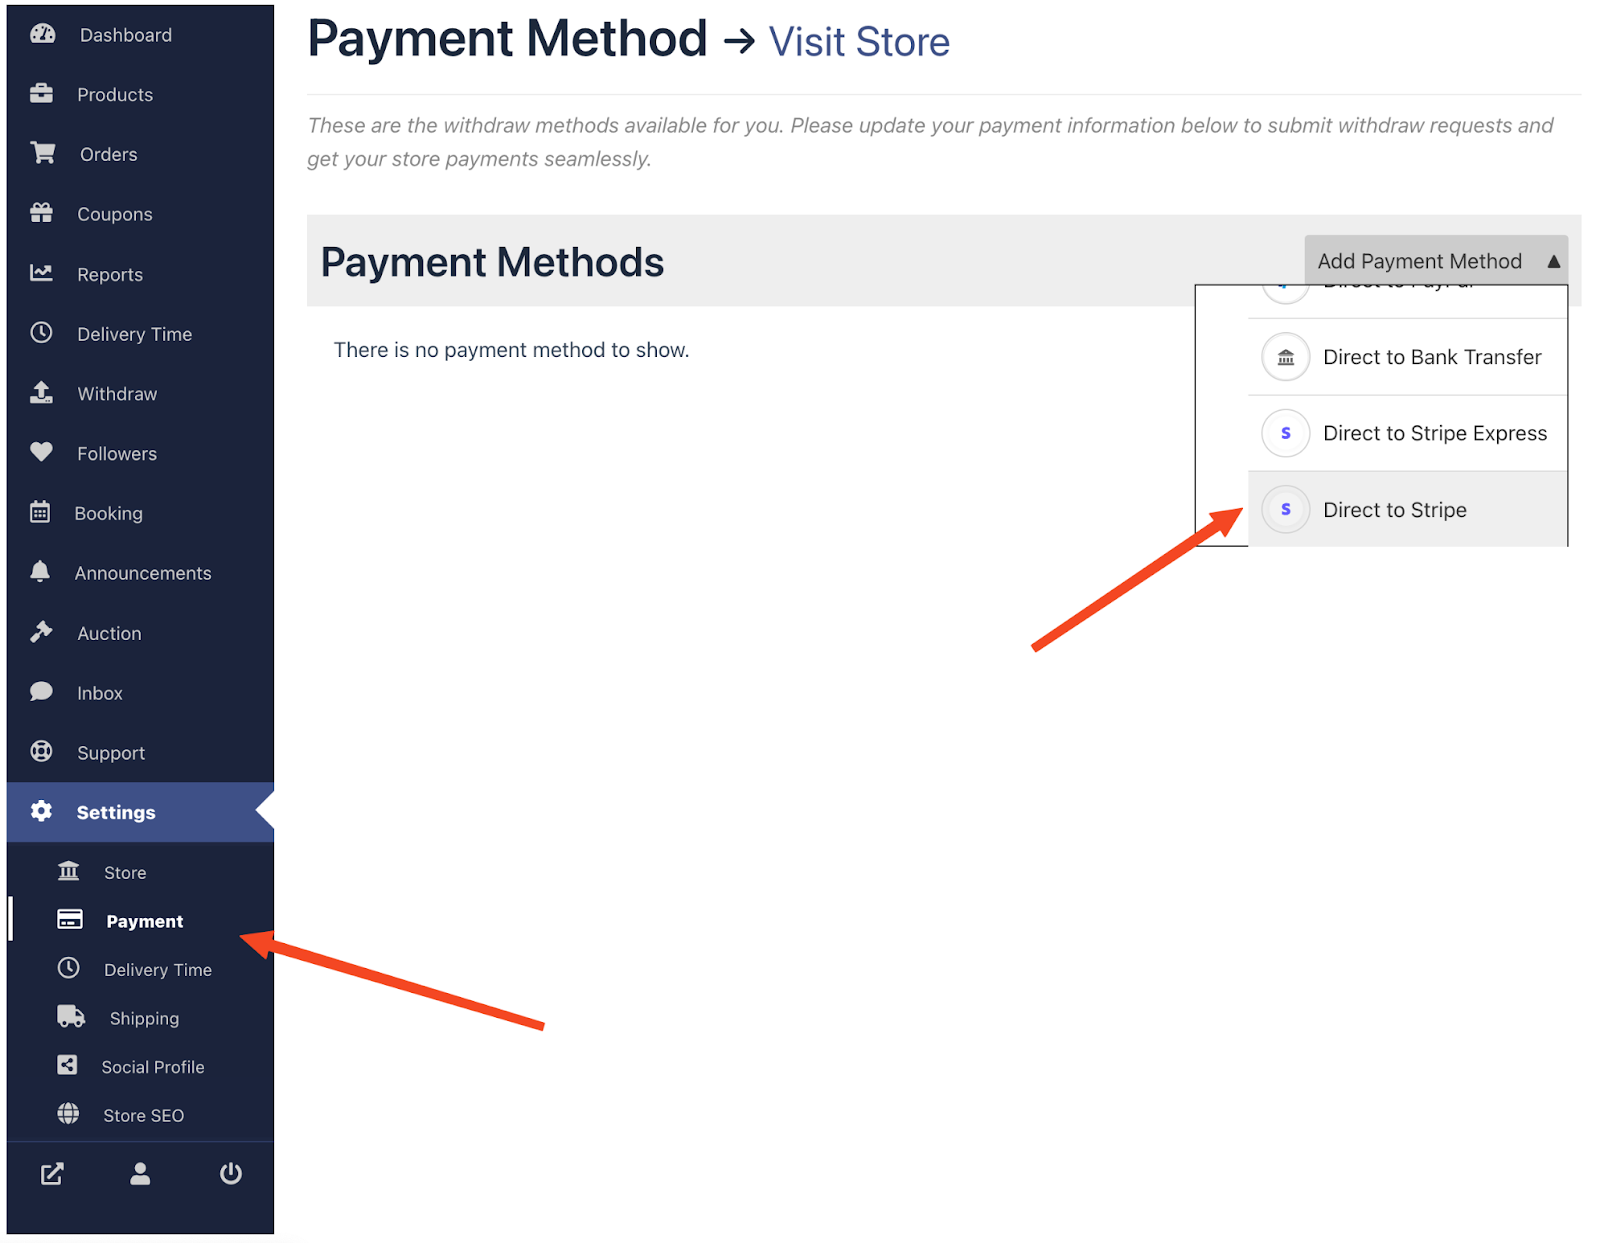
- Navigate to – Vendor Dashboard > Settings > Payment.
- You will see a Add Payment Methods dropdown. Choose Direct to Stripe from the dropdown.
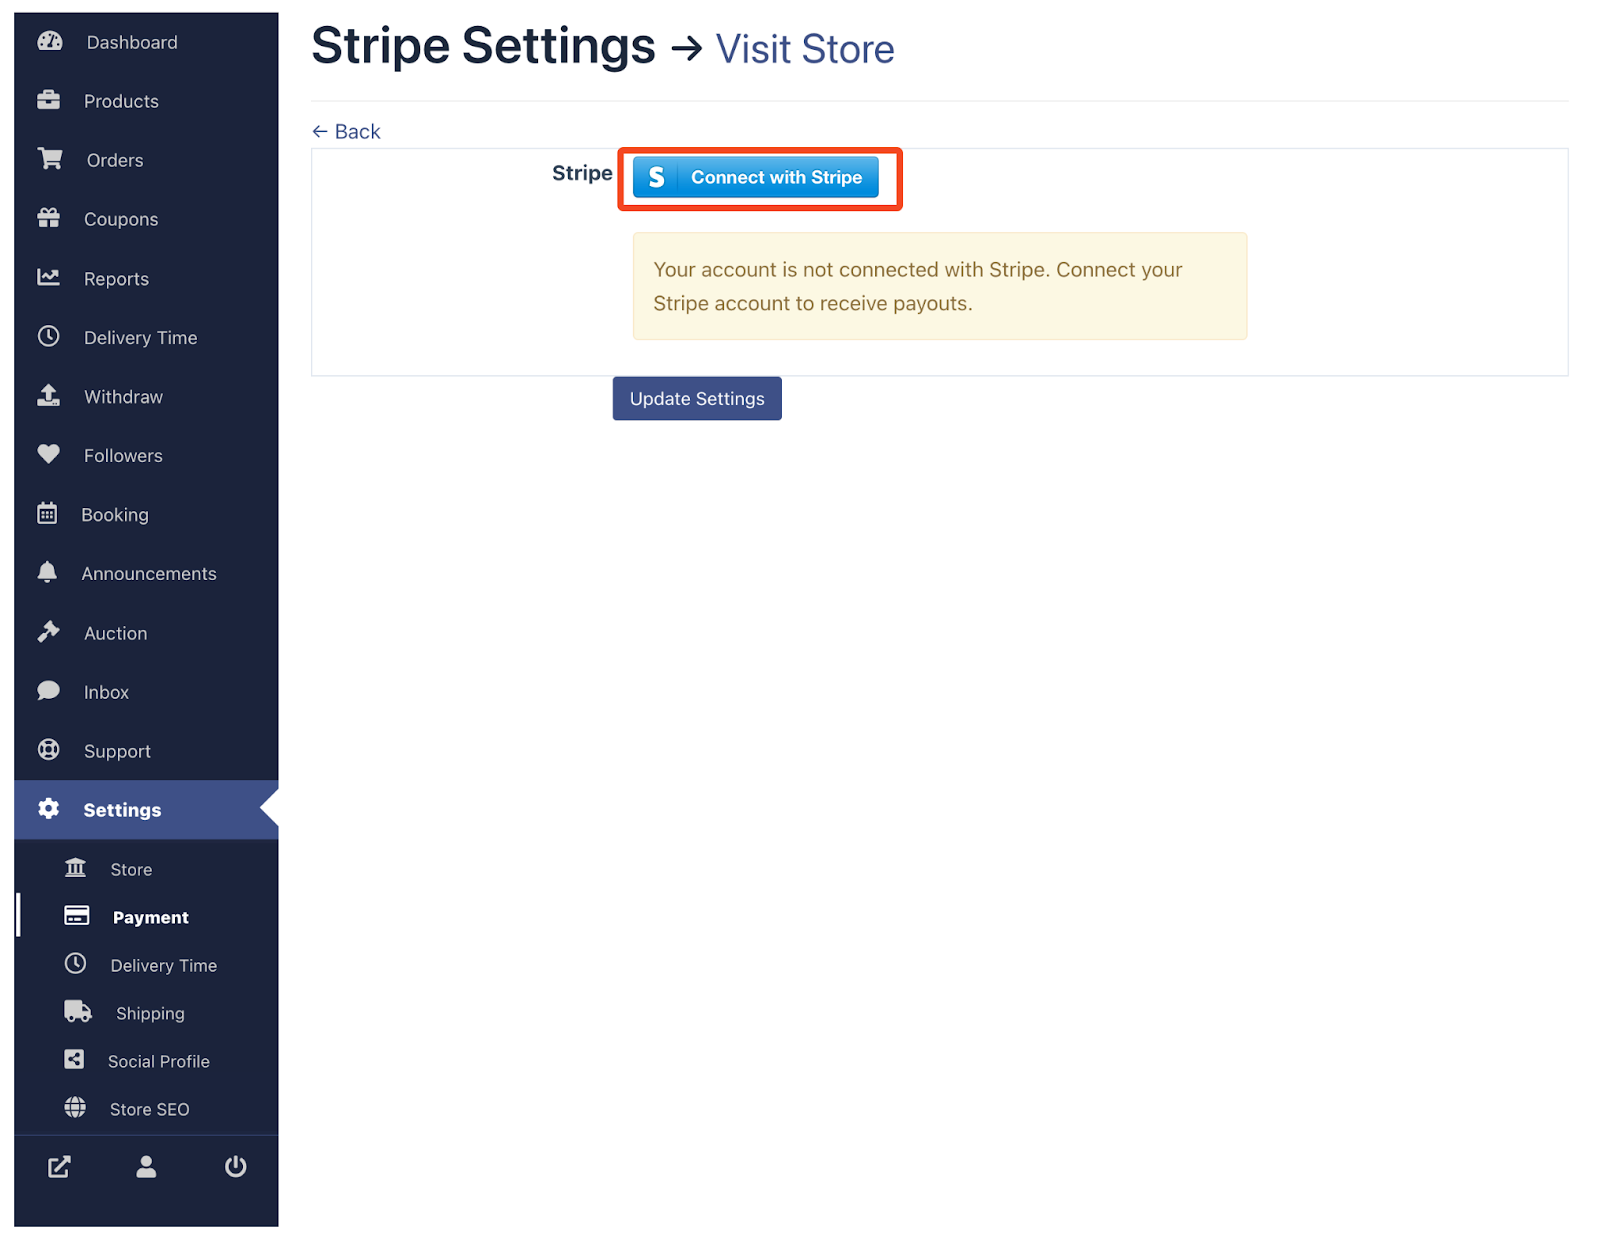
Click on the blue colored Connect with Stripe button, and you will be redirected to the Stripe.com website.
(Vendor) Stripe Login or Signup
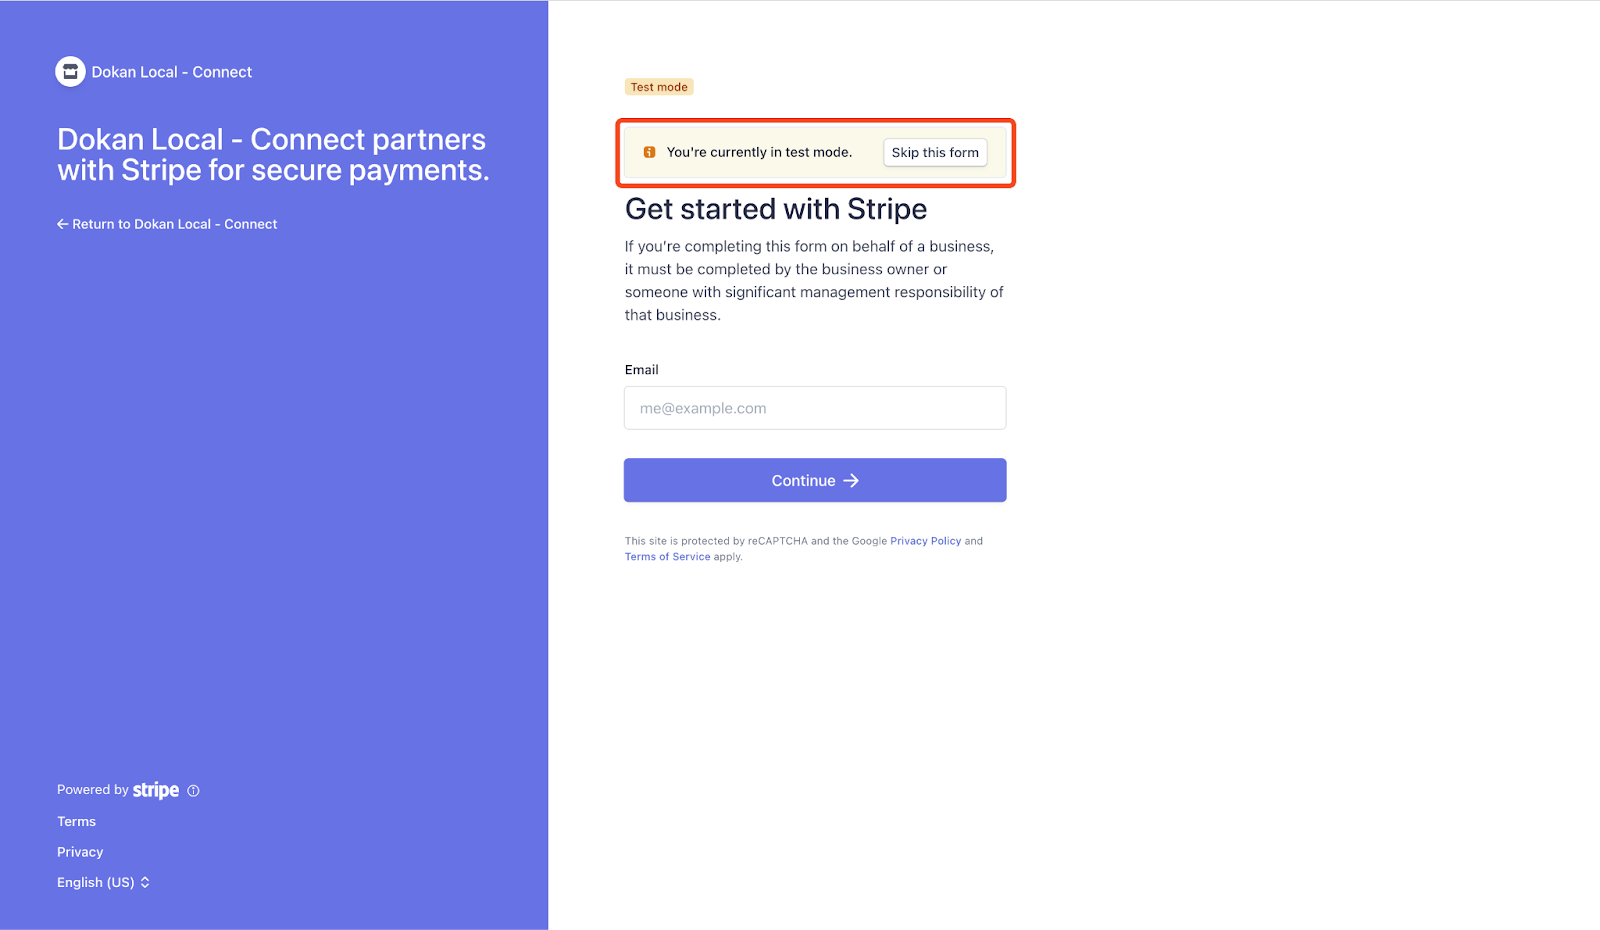
If you are in Test Mode, you will see an option to skip the stripe connect signup/login form.
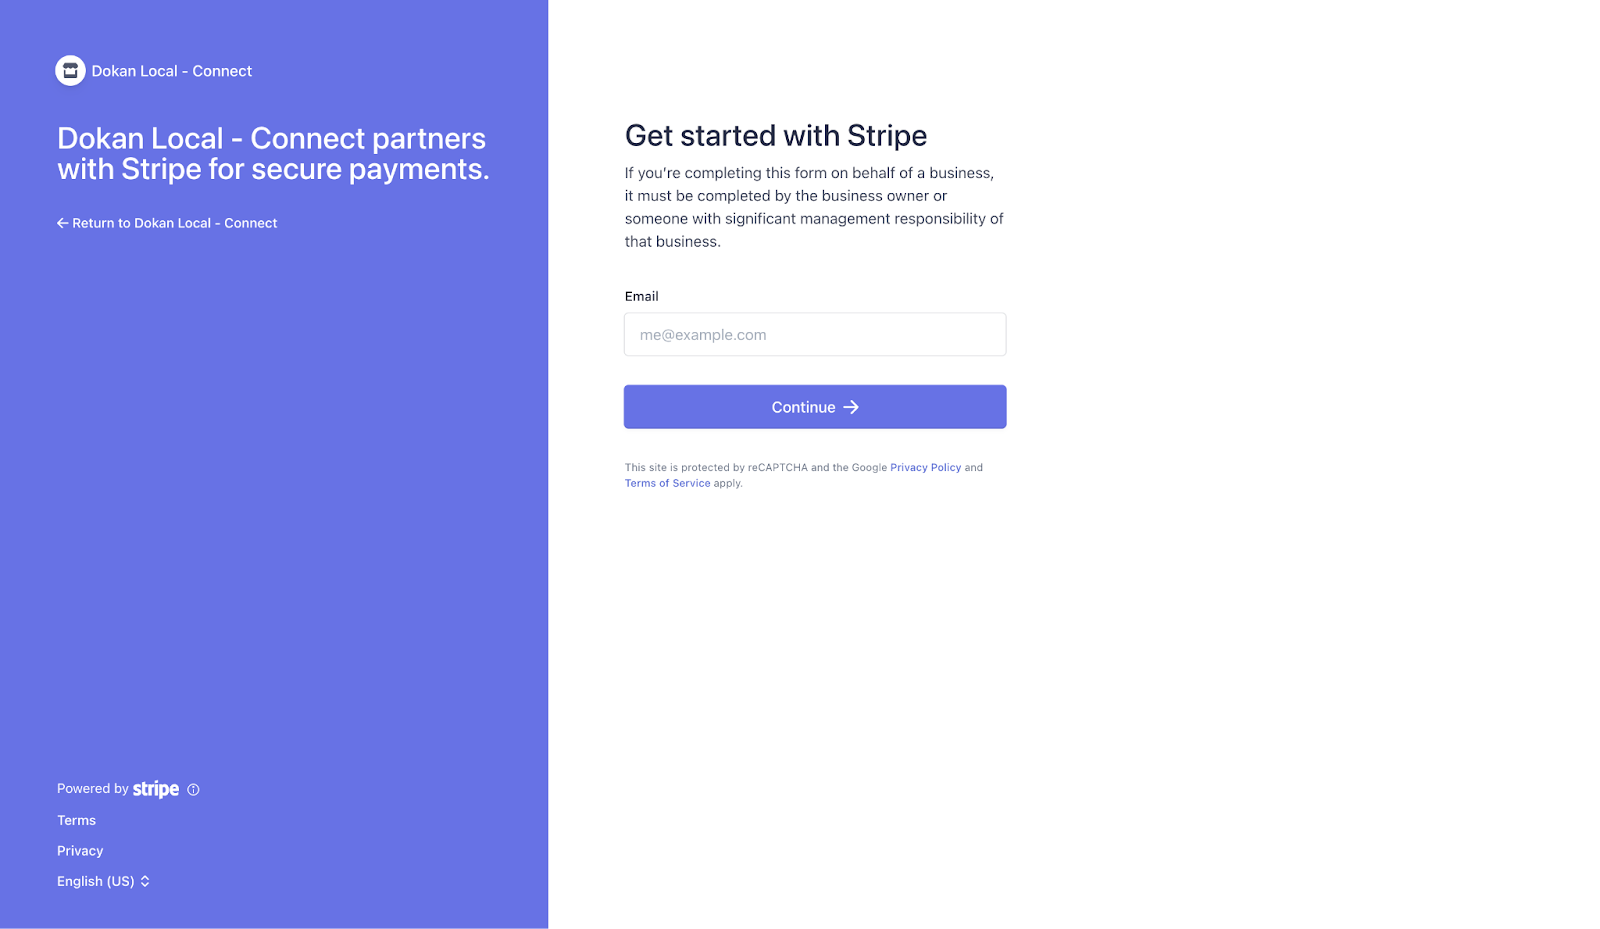
If you are in Live Mode, login with your stripe account or sign up if you don’t have one.
After a successful connection, you will be redirected to your store Payment Settings page.
The Dokan Stripe Connect option will state that it has been connected with Stripe, and you are done with setting up Dokan Stripe Connect to your store.
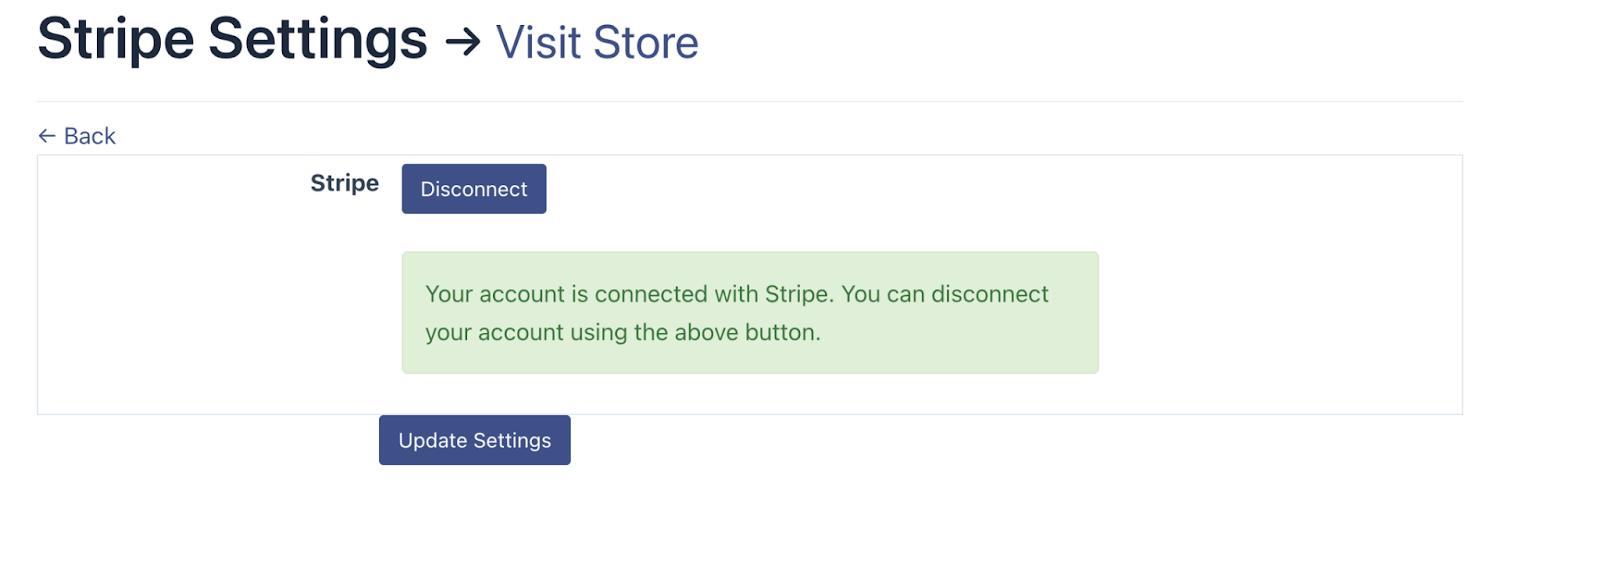
There is a disconnect button, which can be used to disconnect your account from this marketplace any time you want.
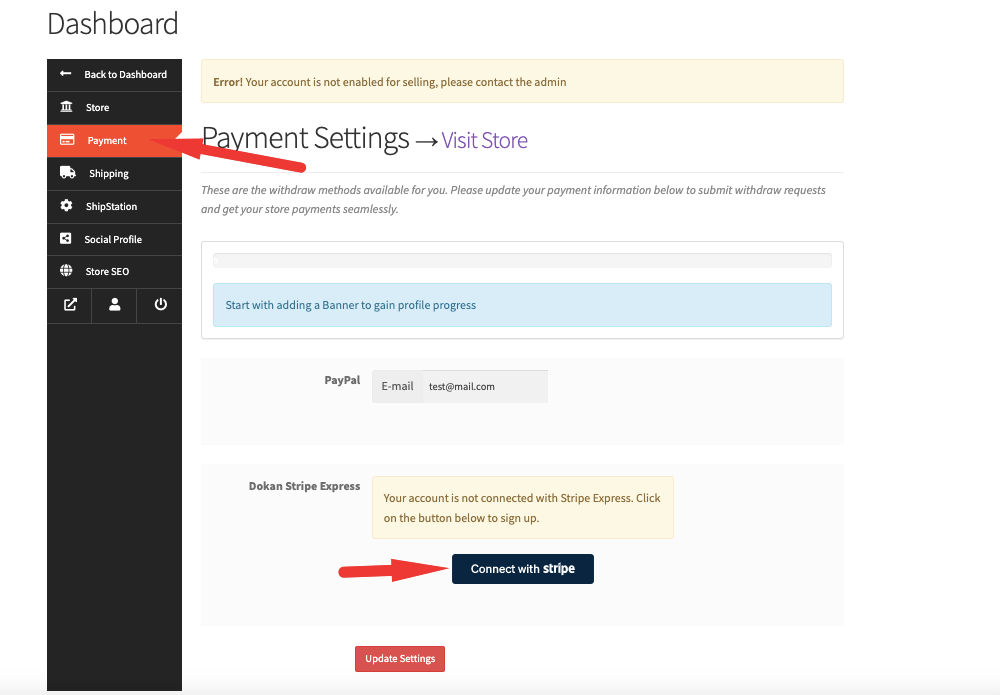
Vendors need to connect their account to Stripe in order to add that method. To do that, go to Vendor Dashboard–> Settings–> Payments. Click on the “Connect with Stripe” button.
Vendors need to connect their account to Stripe in order to add that method. To do that, go to Vendor Dashboard–> Settings–> Payments. Click on the “Connect with Stripe” button.
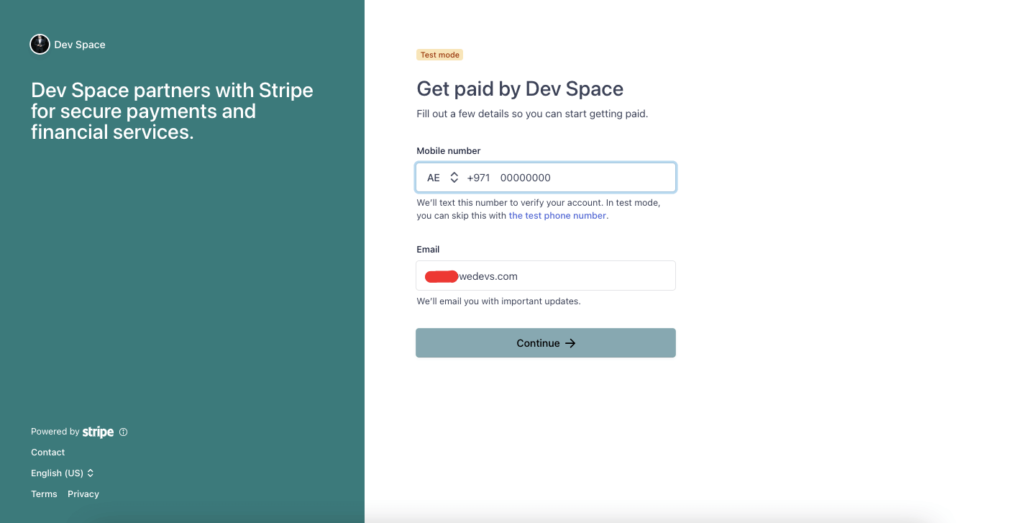
Next, vendors need to ad their mobile number, emails,
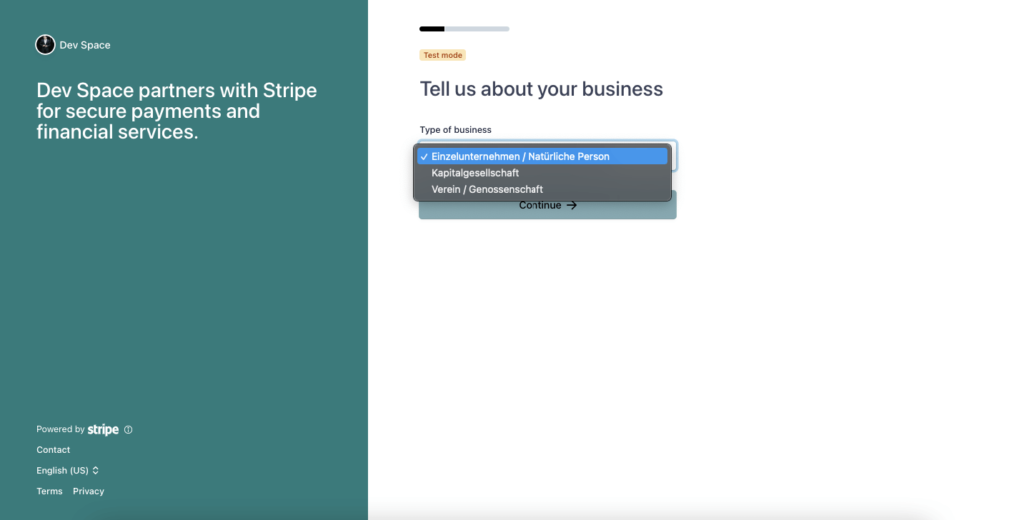
Choose the type of business,
Add personal details,
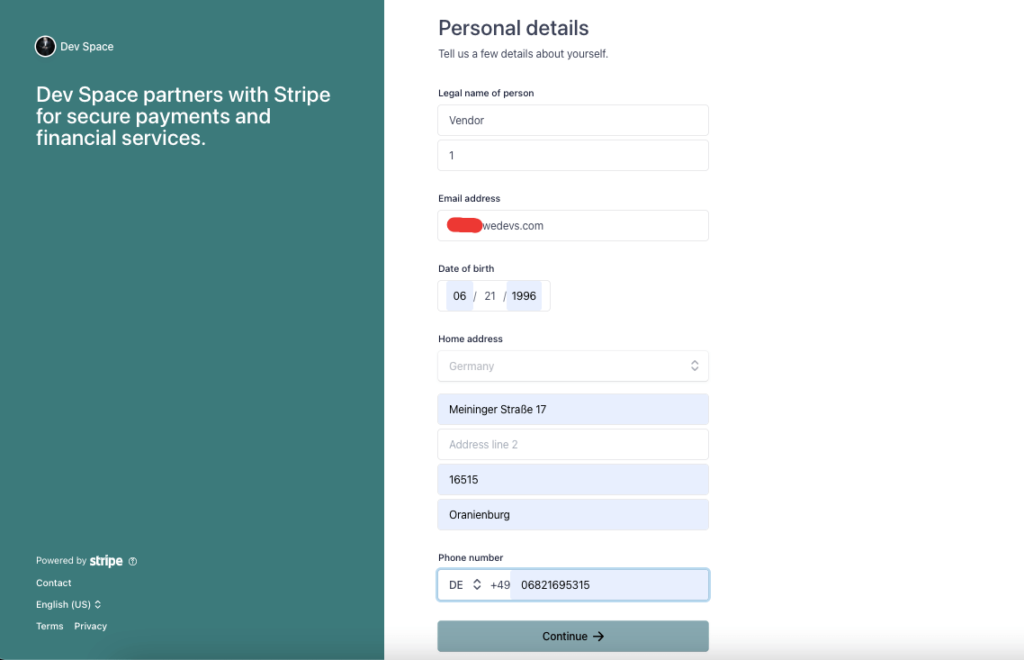
However, if any vendor leave the setup halfway, then he/she will be redirected to the dashboard,
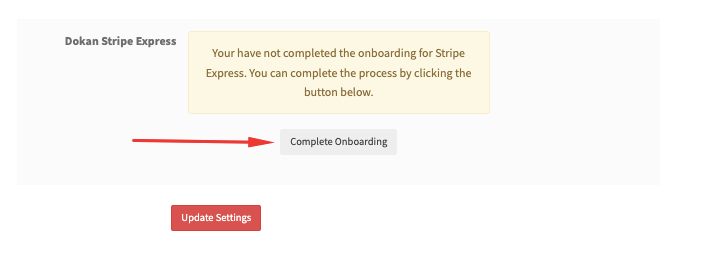
Then you need to click on the Complete Onboarding button then he/she will start from where they left off,
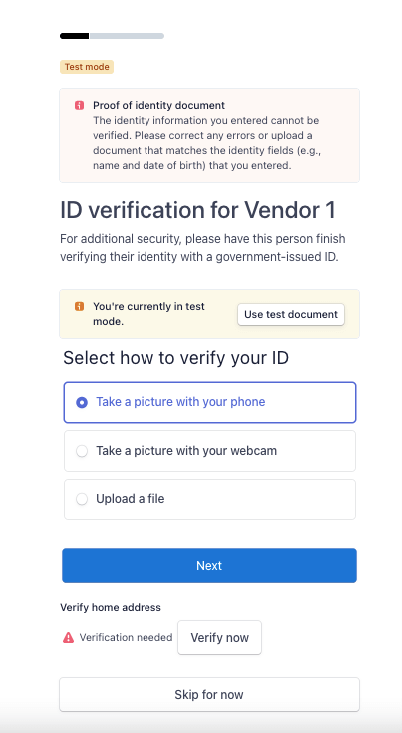
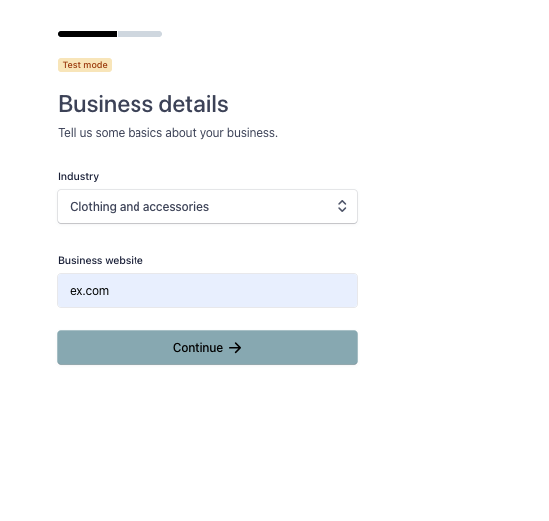
Add the business details,
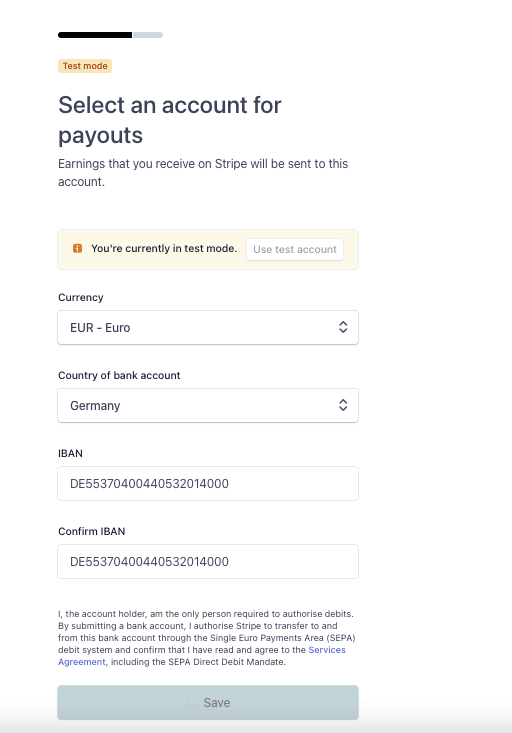
Select an account for payouts,
Review the details carefully,
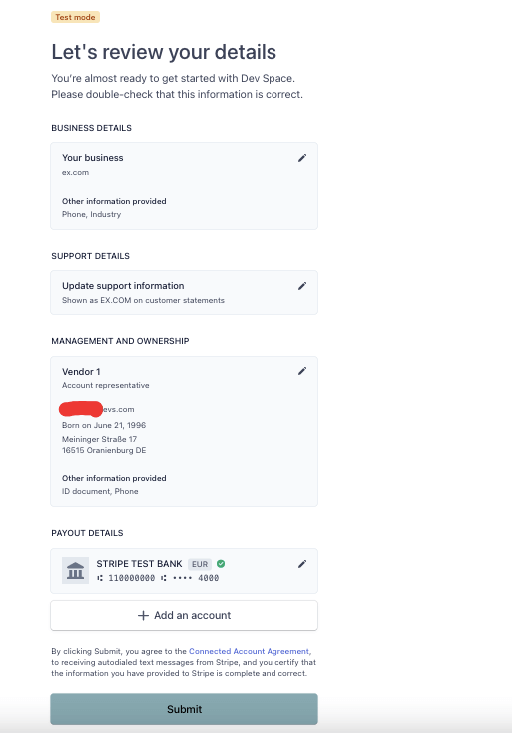
Then the vendors account will be connected,

And vendors will have their own Stripe dashboard when they click on the Visit Express dashboard,
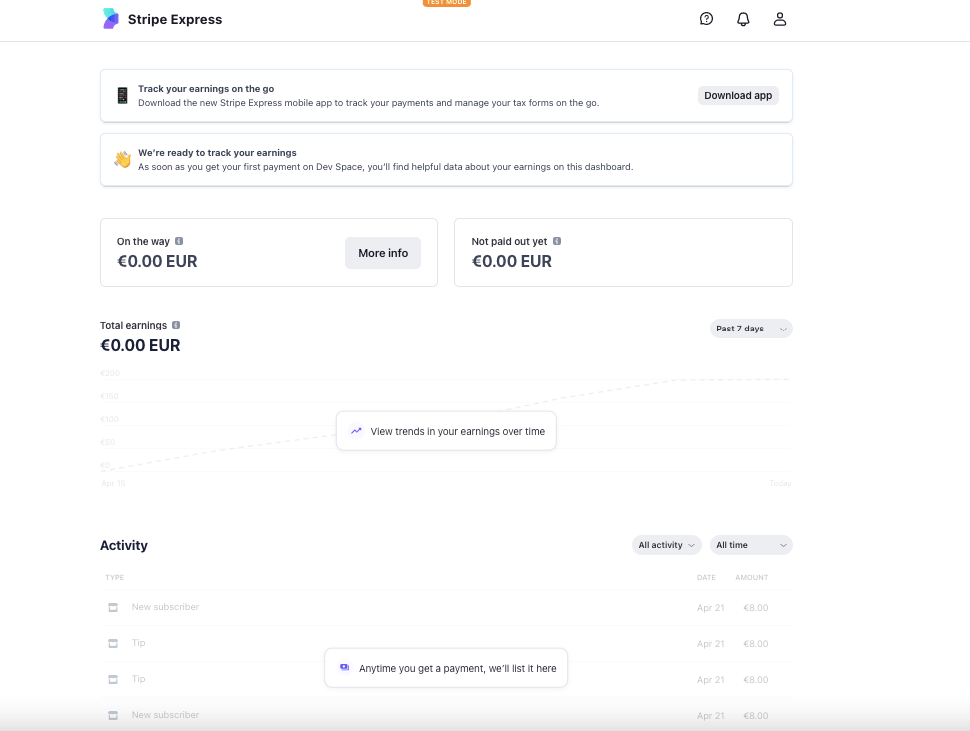
That’s it.
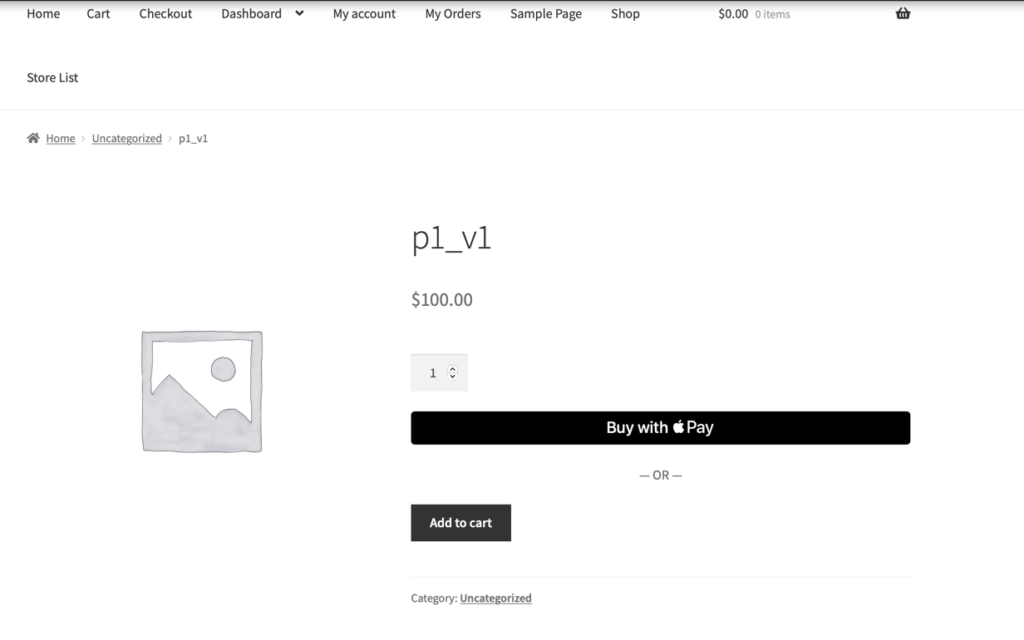
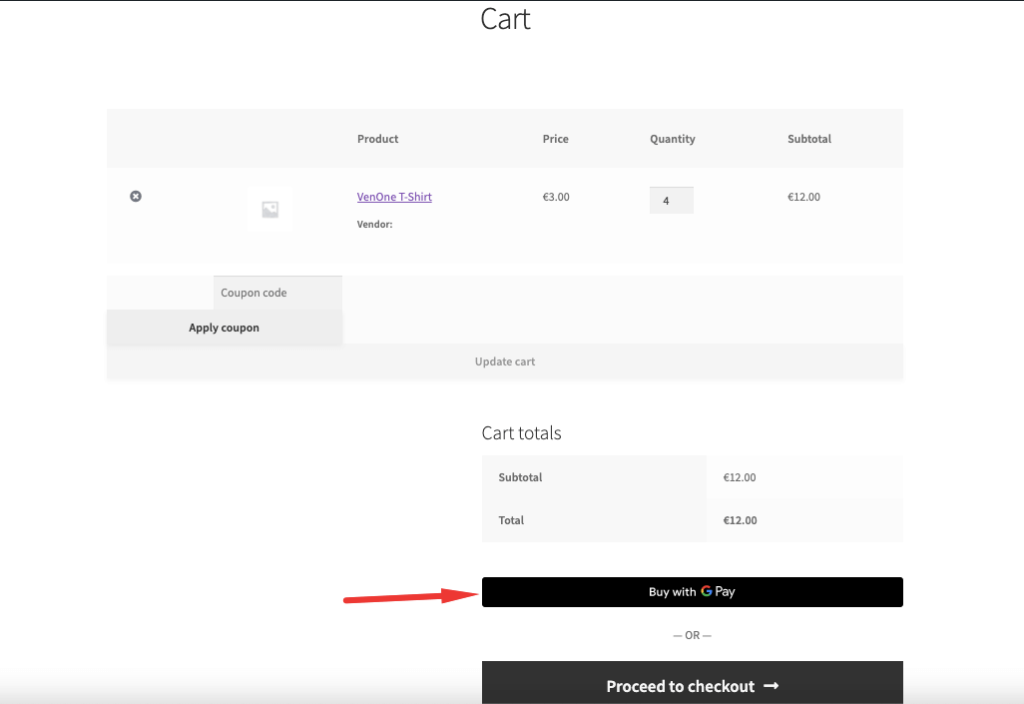
Now, users will see the Google Pay and Apple Pay on the,
Product Page,
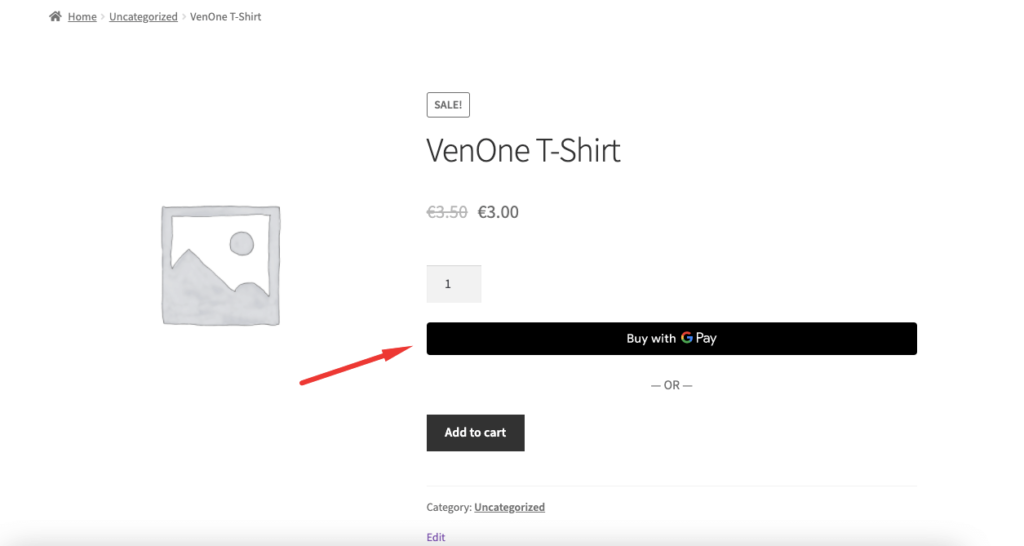
Or,
Cart Page,
And the checkout page,
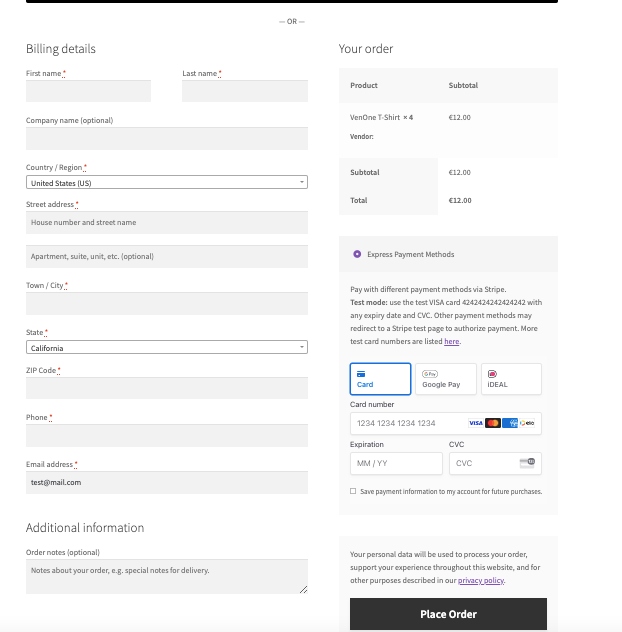
Note: You need to configure your Google Wallet and Apple Pay on your device to be able to use them. Google Pay will work for the Chrome Browser and Apple Pay will work for the Safari Browser.
Stripe Express also supports adding payment method from My Account page. Customers will be able to add and manage their payment method.
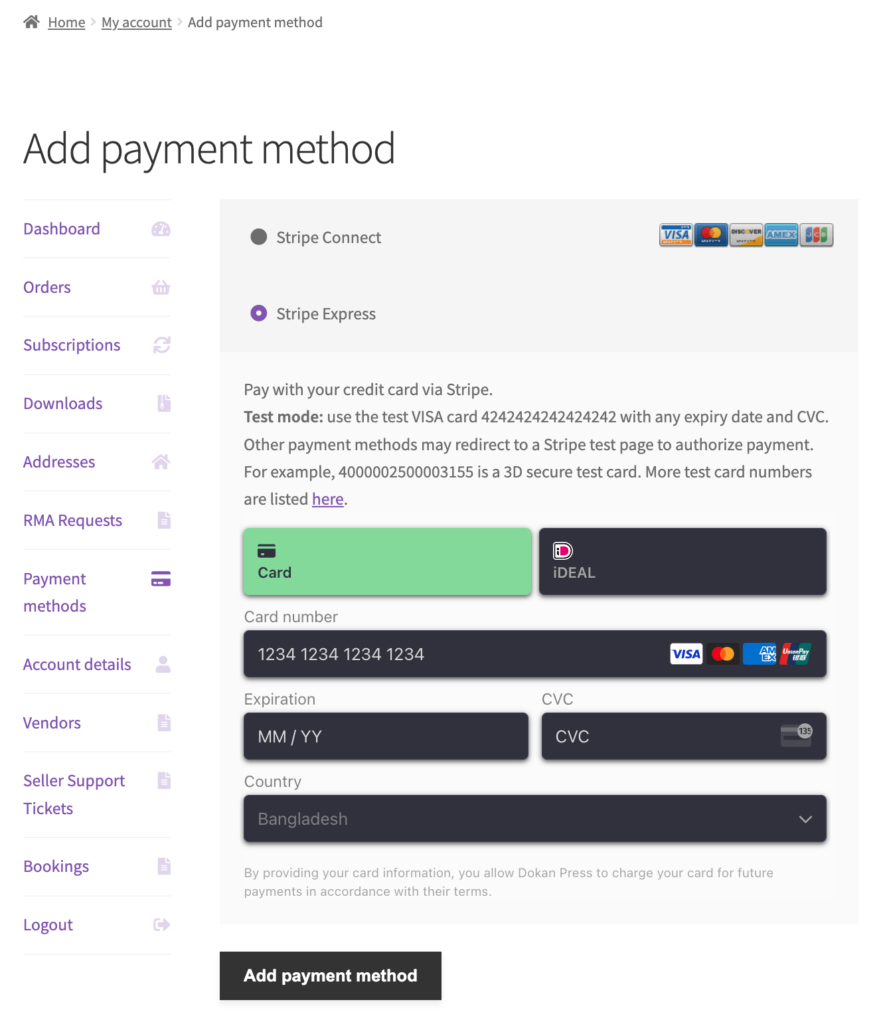
Note: Dokan Stripe Express now has support for WooCommerce Product Subscription.
Customers will be able to buy WooCommerce product subscription using Stripe Express. Also, they will be able to change payment method after purchasing the subscription. Payment method can be changed to both Card and iDeal.
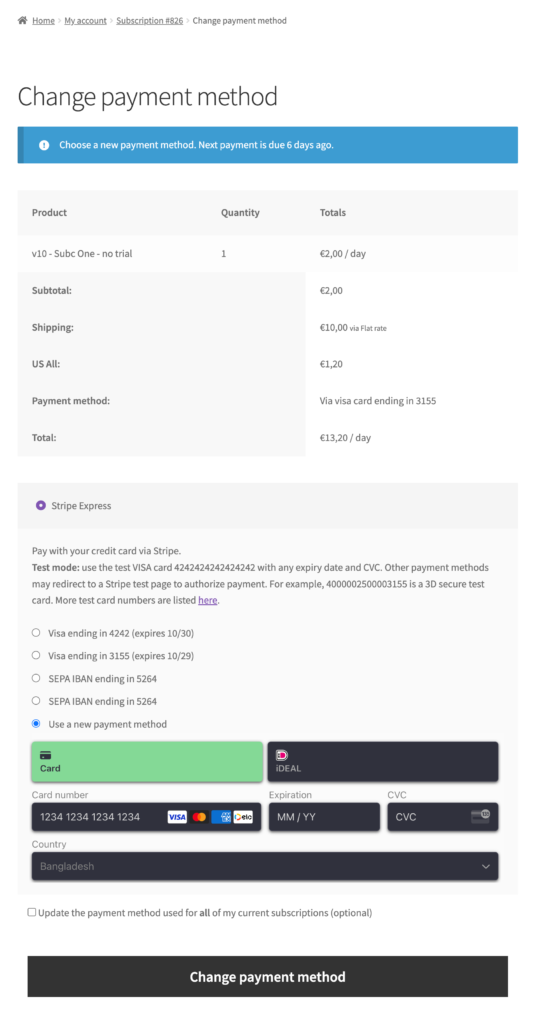
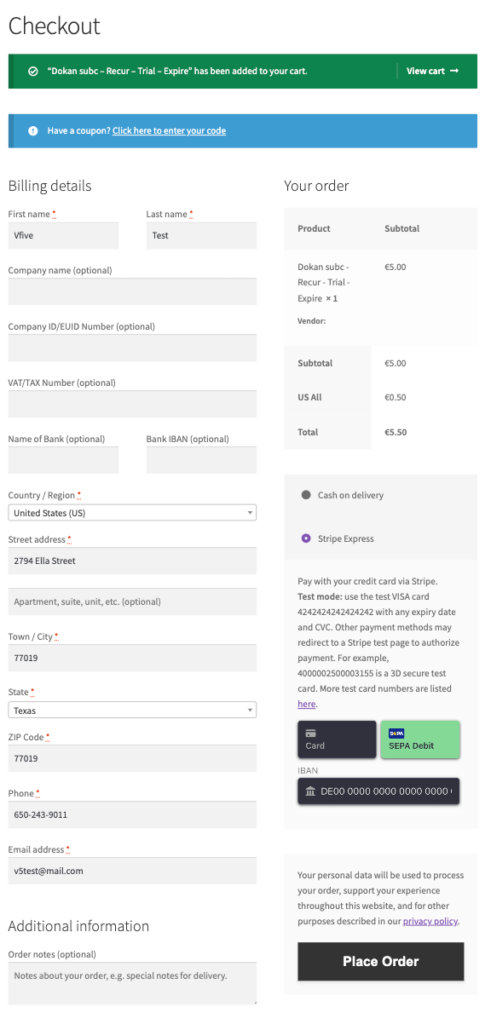
Also, it has support for Dokan Vendor Subscription. In case of recurring payments, the payment element will be shown as SEPA Direct Debit.
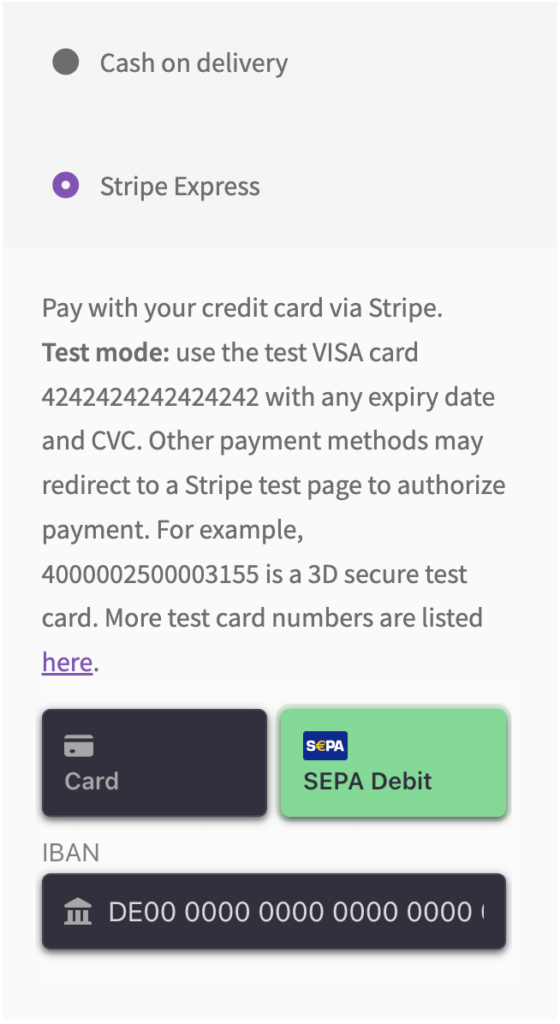
If someone saves IDEAL as the payment method, then it will be shown as SEPA IBAN,
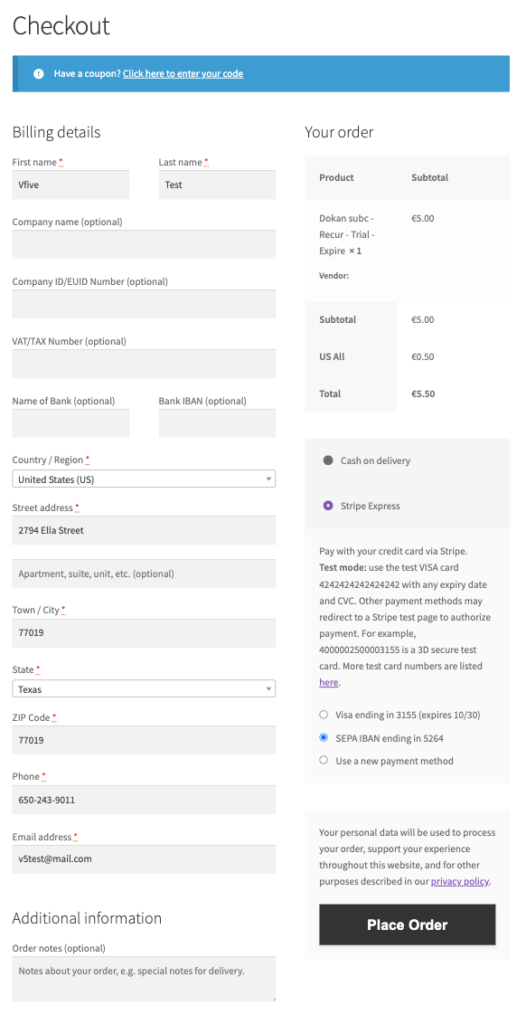
For both iDEAL and SEPA Direct Debit, the saved payment method will be SEPA IBAN,
This is how you can set up and use the Dokan Stripe Express module.
Follow this article for the rest of the refund/transfers implementation.
Cross Border Payout Feature: Recipient Account
With the Cross Border Payout feature, now users from 131+ countries will be able to connect Stripe Express payment method.
But this feature is only for the USA-based marketplaces as per Stripe recipient account agreement requirements.
To enable the Cross-Border Payout feature, just check the Cross-border Transfer option from Cross-border Transfers and Onboarding section.
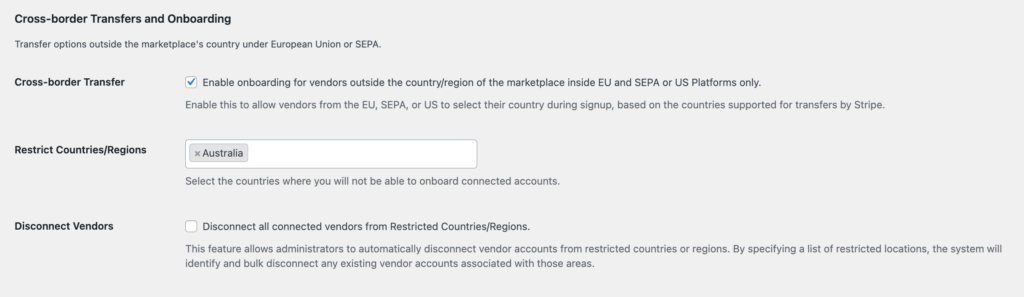
Here you will find different options-
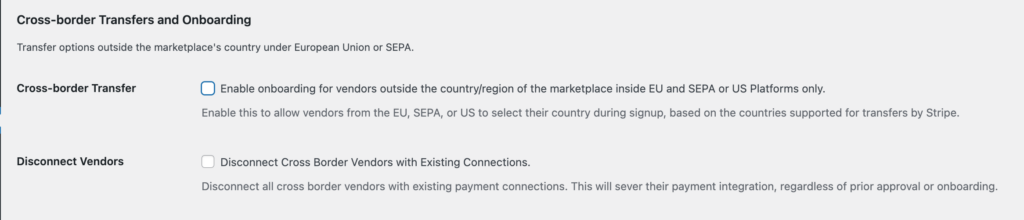
Cross-border Transfer: Enable this to allow vendors from the EU, SEPA, or US to select their country during signup, based on the countries supported for transfers by Stripe.
Disconnect Vendors: When Cross-border Transfer is not enabled, then this option will be visible. It will disconnect all Cross-Border vendors with existing payment connections. This will disconnect their payment integration, regardless of prior approval or onboarding.
Restrict Countries/Regions: Select the countries where you will not be able to onboard connected accounts.
Disconnect Vendors: This feature allows administrators to automatically disconnect vendor accounts from restricted countries or regions. By specifying a list of restricted locations, the system will identify and bulk disconnect any existing vendor accounts associated with those areas.
There are a few conditions where the vendors will be disconnected-
- Vendors from the restricted countries will not be able to onboard
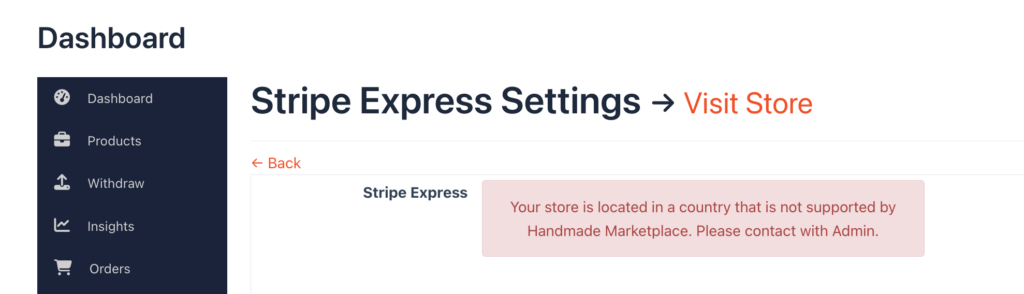
- If the vendor changes their address to one of the restricted countries, then they will be automatically disconnected.
- When the admin selects restricted countries and also enable the Disconnect Vendors option , then the old vendors who are from those restricted countries will be disconnected. Only choosing a restricted country or countries, will restrict vendors from those countries to onboard, old vendors from those restricted countries will stay connected.
- Disconnected vendors will get a message in the Announcement section of the vendor dashboard-
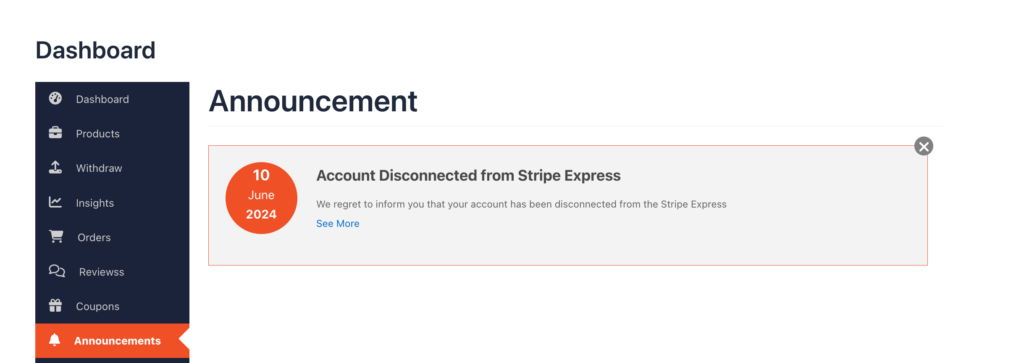
- If the admin only disables the Cross-border Payout feature, then the old connected vendors will stay connected.
- But if the admin disables the Cross-Border Payout feature and enables the Disconnect Vendors option, then all the vendors under the Cross border feature will be disconnected, and the regional vendors will stay connected.
- If an existing vendor changes their country to a non-restricted one, then they need to onboard again.
Now, vendors from 131+ countries can use Stripe Express-
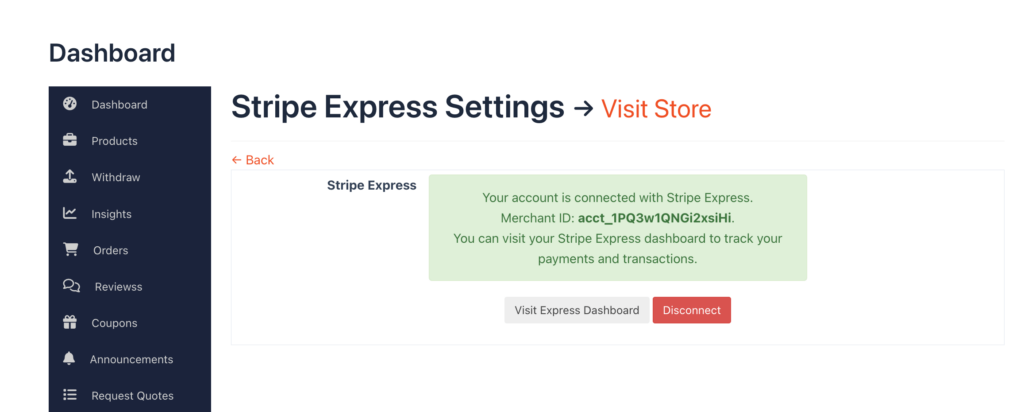
To connect their PayPal account, the vendors need to navigate to Vendor Dashboard–> Settings,
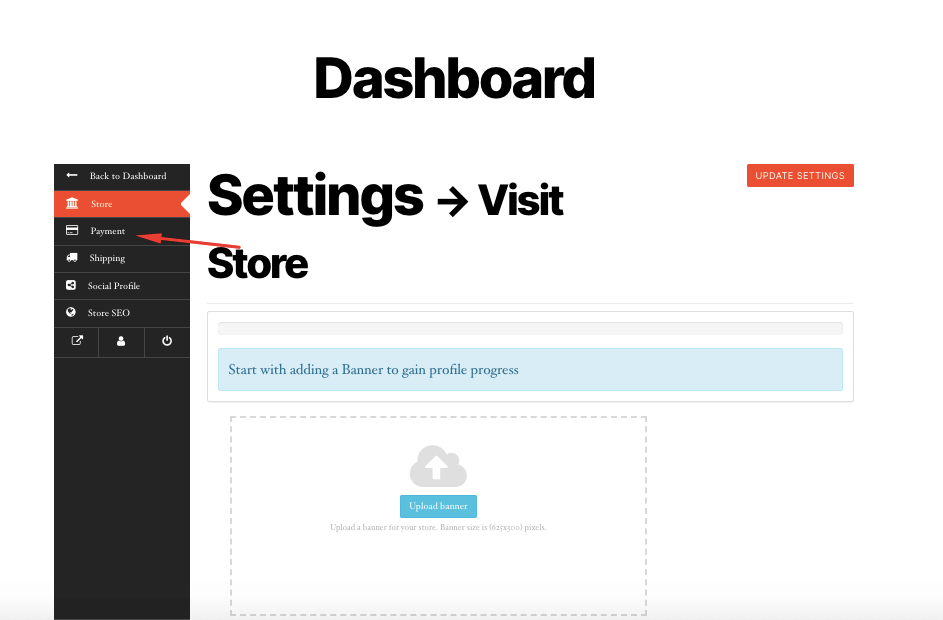
On the next page, choose the Payment option. They will see a Text Field. They need to add their PayPal email address and hit the SignUp button. A pop-up window will appear and they need to select the region. When they click on the Next button, they need to add their password and press Log in.
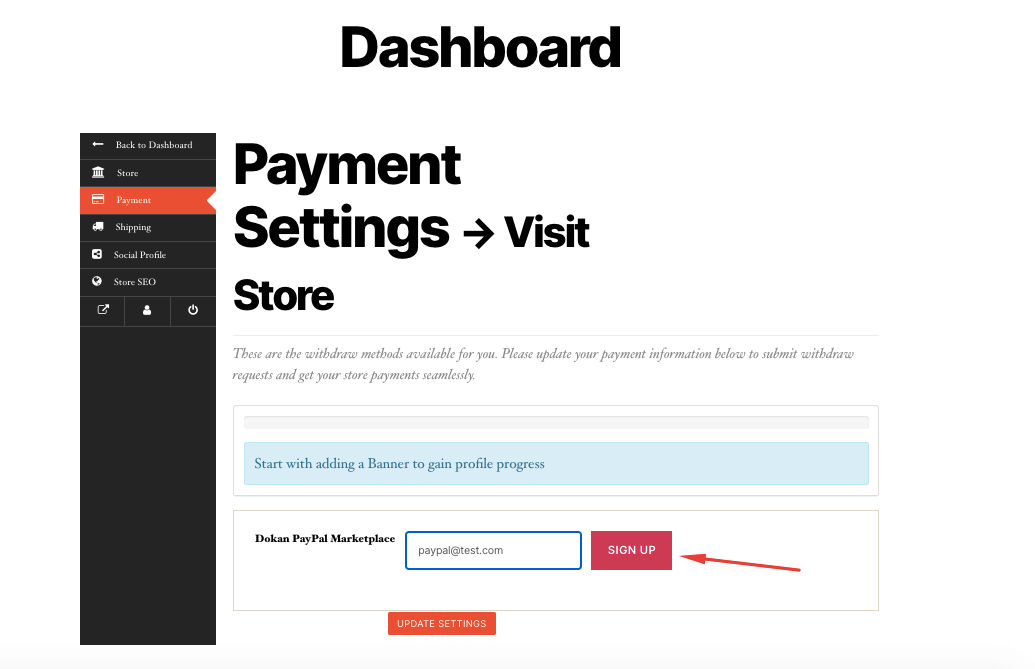
On the next page, choose the Payment option. They will see a Text Field. They need to add their PayPal email address and hit the SignUp button. A pop-up window will appear and they need to select the region. When they click on the Next button, they need to add their password and press Log in.
Vendors can use existing or if they want they can create a new business account. It’s up to the user.
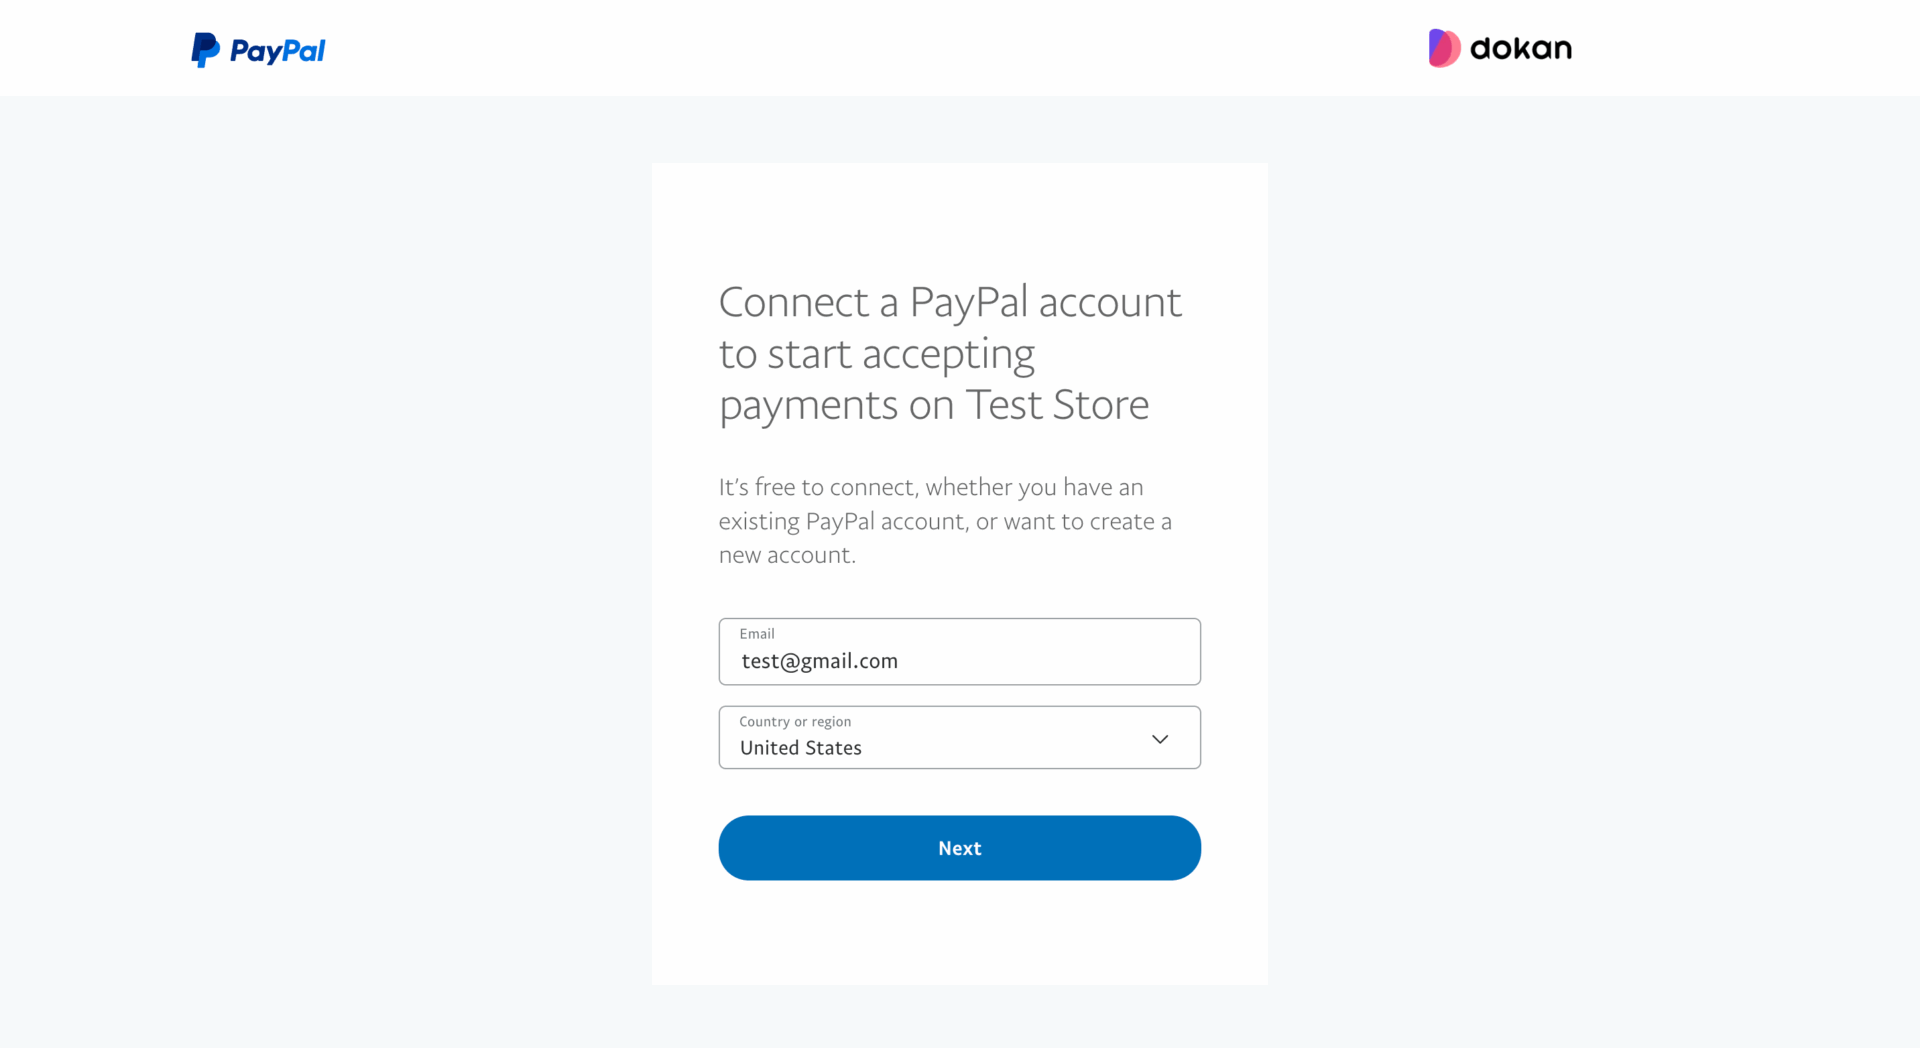
Then the vendor needs to add their password to log in-
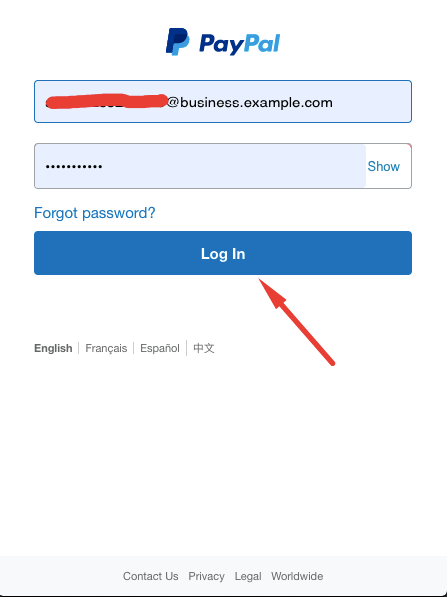
This will complete the process-
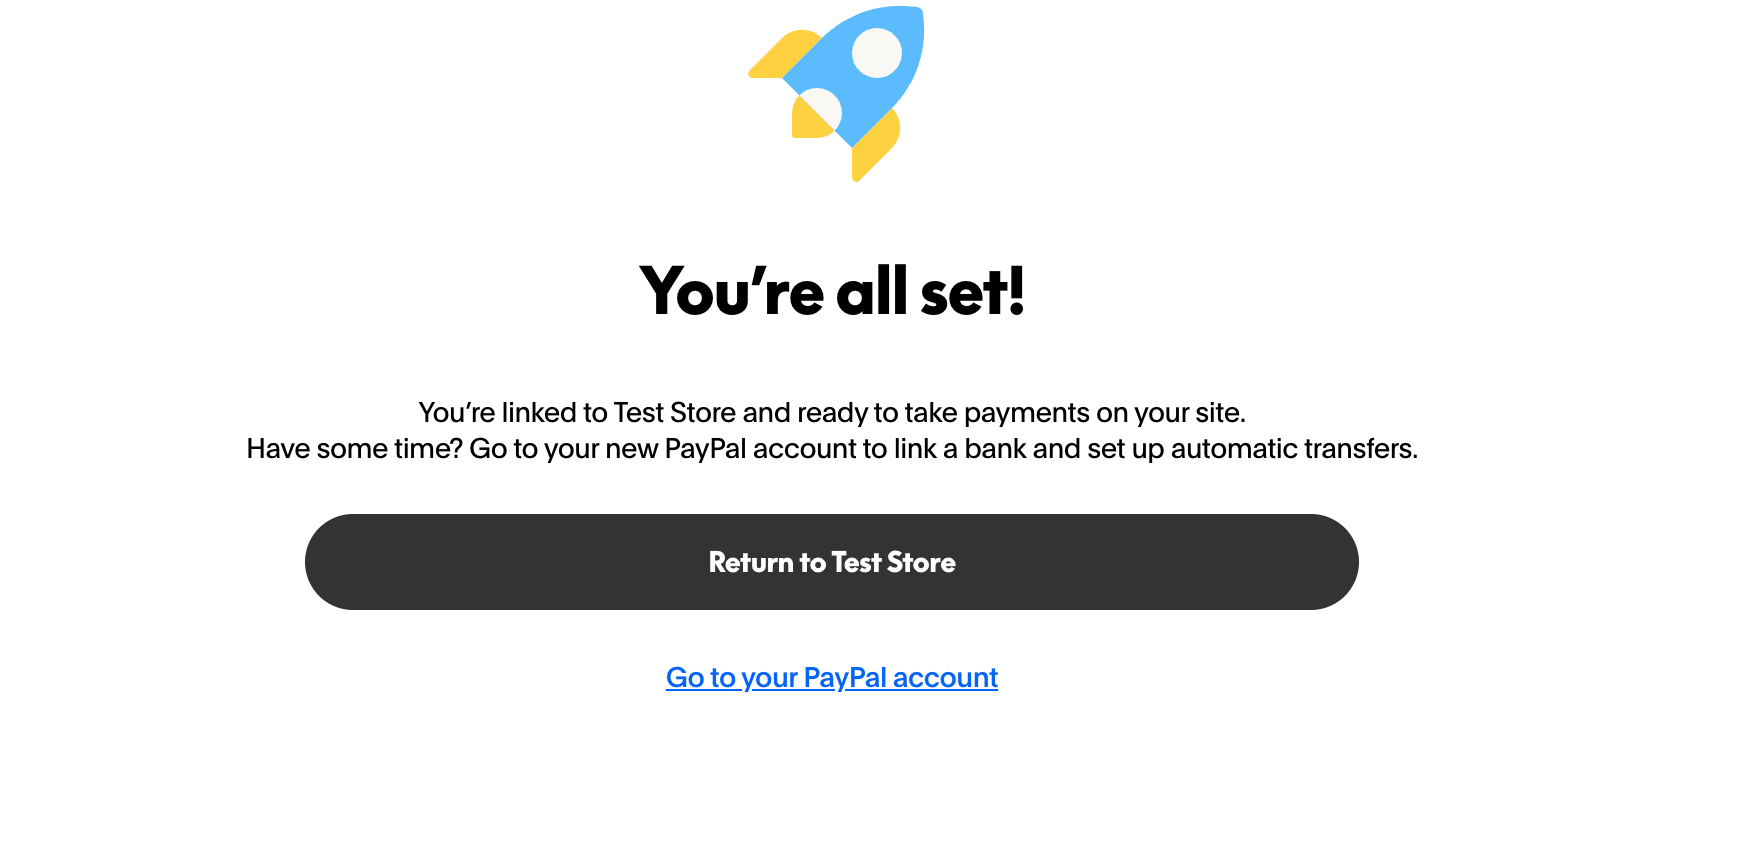
Vendor will see that their store is connected-
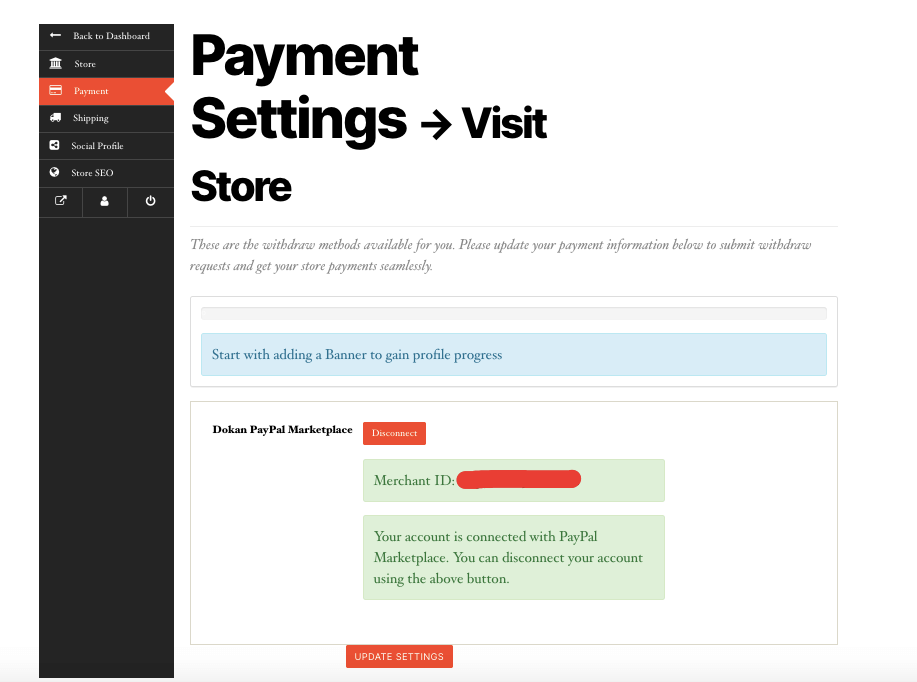
If the connection is successful, they will be redirected to the marketplace and they will see their Merchant ID, a notice that the connection is successful. That is how Vendors can connect their PayPal account to the marketplace.
Note: if the vendor’s account needs further verification from the PayPal end, vendors will see the relevant message here instead of the Disconnect button. Once PayPal verifies the vendor’s PayPal account, their PayPal account will be automatically connected and they don’t have to follow further actions to connect their account from here (payment settings page)
Checkout Eligibility
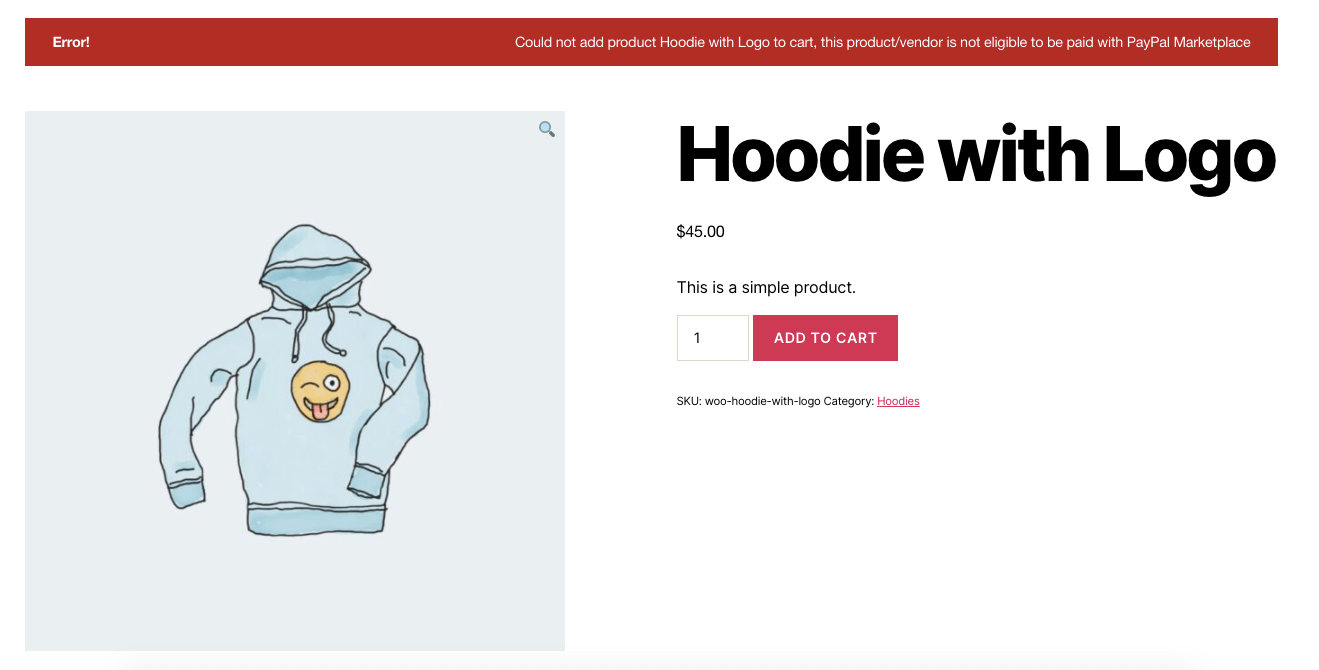
Vendors need to connect their PayPal account before they start selling their product. if the vendor is not connected to their PayPal account, and PayPal marketplace is the only payment gateway available, then when a customer adds a product from those vendors they will see a notice like this,
Otherwise, they’ll see a notice to remove products for those vendors in the checkout page.
Also, Customers can buy products from 10 vendors at a time while using the Dokan PayPal Marketplace payment gateway. That is the PayPal policy. There is no limit on how many products they can buy at a time.
Refund
Vendors can refund the orders right from their vendor dashboard or PayPal dashboard.
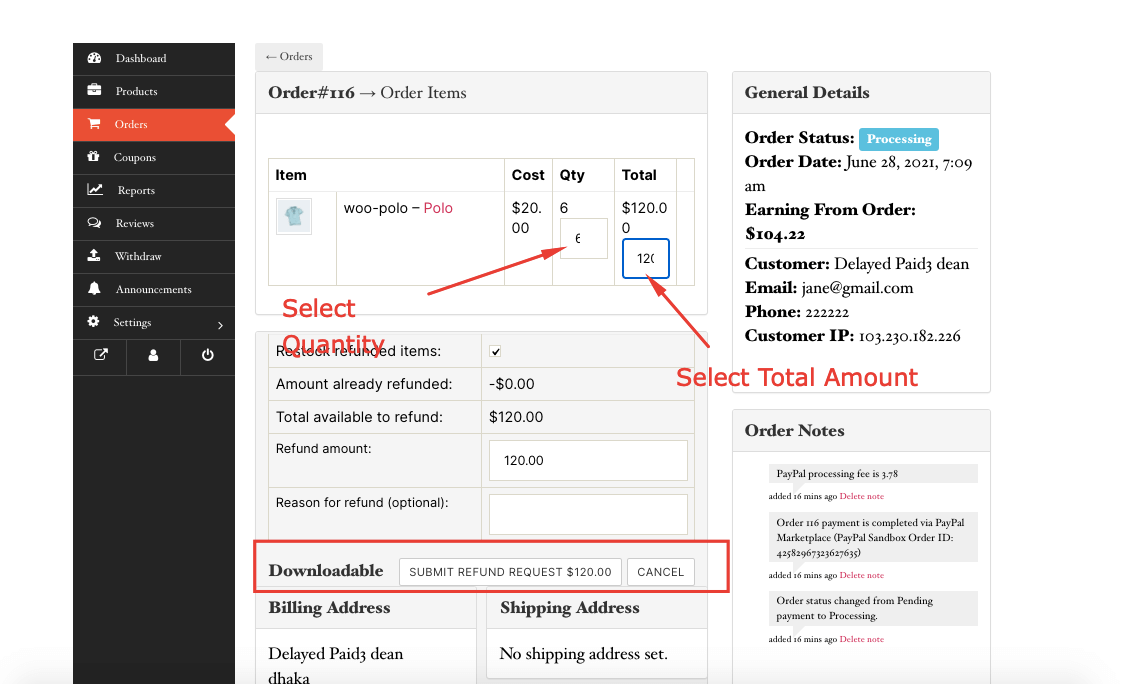
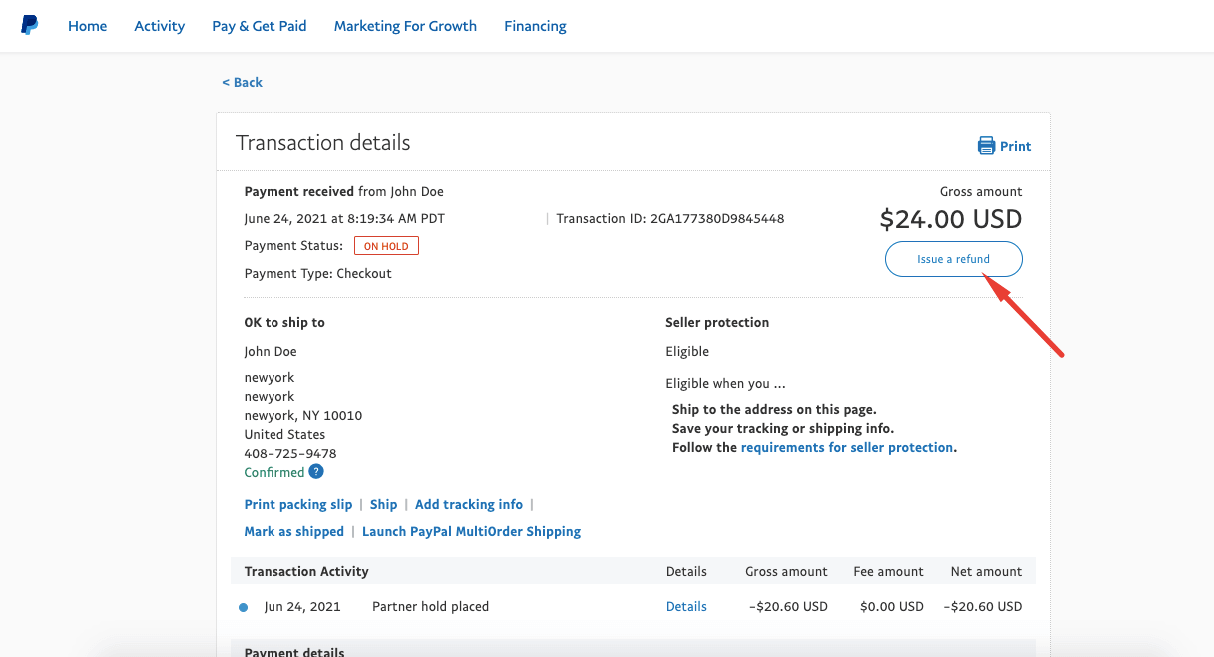
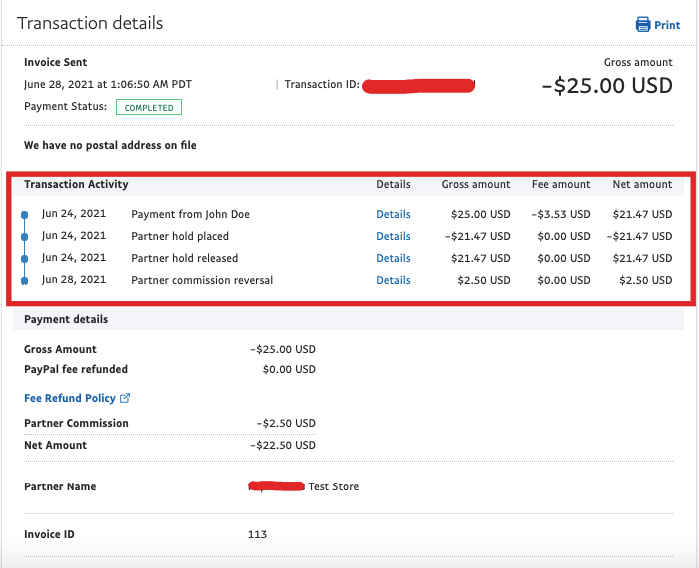
To refund orders from the Vendor Dashboard, choose an order from Vendor Dashboard–> Orders. Now, if there are multiple products, select the quantity and the amount you want to refund. Then, click on the Submit Refund Request button. Then the Refund will be complete. Or they can issue a refund from the PayPal dashboard. Choose an order from the PayPal dashboard and click on the Issue Refund button. You can see all the details in the PayPal dashboard or in the Orders section of the Vendor dashboard.
Note: Suppose a customer bought a product worth $100, after adding tax and shipping ($10+$10), the total amount is $120. The admin commission is 10%. Admin will receive $10 as the actual price of the product is $100. However, PayPal will assume that the admin’s commission is based on the $120. In the case of a partial refund, if the refund amount is $60, that means PayPal will also calculate the admin’s commission.
Although admin got commission only for the product price, for a partial refund, admin commission percentage will also be refunded.
In that case, the admin won’t have to pay any extra money in case of a partial refund. Admin percentage of Application fee/ Partner fee will be refunded, not more than that. Check PayPal documentation to learn more about how PayPal refund works for marketplace payment.